Pages

Jun 9, 2011

Dining Room Table Project - Painting #1

I'm labeling this post "#1" because I can tell already the painting is going to take a while.

I only accomplished half the table in about 30 minutes tonight. As the chairs require much more skill and carefulness, I anticipate me finishing this table in August. Here's to positive thinking!

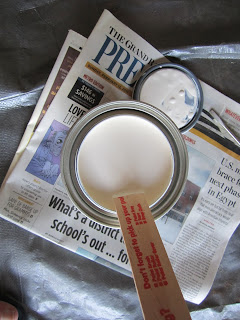
I chose Linen White semi-gloss latex paint by Behr. Why Behr? Because that's what Home Depot sells. As for the color, all I did was look at a few white color samples in the store, pick one, and take it home.


I did make sure to get semi-gloss finish so that it would be nice and wipe-able in the future.


 The paint looked particularly yellow next to the stark white primer. I'm getting scared. 

Well, that looks ok. I hope once I get it all painted, the color will even out. If it doesn't, I will try my hand at glazing!


One word about a good paint brush. It is worth every penny. I bought the nicest paint brush that Home Depot sells (probably not saying much to all the pro-painters out there, but it was the best the store had). Let me tell you, I can make a straight line, no problem, with that brush. Priceless!

Now for an action shot! Yours truly painting the table.

Jun 8, 2011

Dining Room Table Project - Sanding #2

I hope this is not yet another step I could have skipped. Maybe I should have read the back of the primer or paint can again.

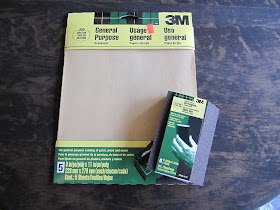
Anyways, I lightly sanded all of the primed surfaces with a fine grit sanding block. I purchased both fine grit (220) sandpaper and the sanding block. The block was by far the easier one to use.


It took me about 45 minutes to sand everything. The primer sanded off quite easily. I hope I didn't hurt anything, but I noticed that I was sanding all of the primer off on the corners. Oops. We'll just hope the paint covers that right up.


Second round of sanding is complete!


What do you mean you can't tell the difference?

Jun 7, 2011

Dining Room Table Project - Priming

Timing was the tricky part for the staining and priming/painting steps. I wasn't sure which one to do first. I decided to do the staining first, and tape off the stained areas while I painted. This proved to be quite tricky for the back of the chair.

I used Zinsser oil based primer, and I think it had great coverage and grip to the chairs. 


After taking this picture, I read the label. 

"Sticks to all surfaces without sanding."

I could cry. Betsey and I roughed up all the surfaces that were going to be painted, thinking it was necessary for the primer and paint to stick. Lamentations, we could have been done sanding at least 2 hours earlier!

I turned the chairs over to paint the legs first.

Then, I attacked the top of the chair. Priming without touching the stain was quite tricky, especially with all the nooks and crannies to get into. To help eliminate errors, here is my super-great taping technique.


It wasn't foolproof. I still got paint on the stain. Darn. I will have to figure out how to fix that at some point.


Four-ish hours later, she's done!


I'm quite nervous about the quality of my priming job because oil-based primer dries REALLY quickly. I'm hoping a little sanding and the paint will even everything out. It looks a little shotty right now. 

It's coming along!

Jun 6, 2011

Dining Room Table Project - Staining

With the tough part, sanding, completed, it's on to the fun part - staining! 

Remember, the table will have a stained top with painted legs, and the chairs will be similar, stained seat and painted legs. 

I chose Dark Walnut stain by Minwax. I found it a breeze to work with. I didn't have to worry about dripping too much because most of my surfaces were horizontal. The seat backs weren't, but still no issues with dripping.


The can said to leave the stain on for 5-15 minutes before wiping off. The longer you leave it on, the darker the stain will be. So I put on my first swipe with the paint brush, and it almost completely soaked in immediately. Yikes! I was not expecting that. It was like a sponge how quickly the wood soaked up the stain.

I think I dried out the wood somehow. I'm a beginner so I don't really know, but I had an almost black stain after sitting on the wood for almost 3 minutes. I've read other blogs where they did 4 coats of the exact same stain, and theirs is nowhere near as dark as mine. 


I think the color will be fine once the legs are painted. It looks terribly dark right now, but I do like how the wood grain shows through.


Sad day, you can totally tell where Betsey and I didn't sand as thoroughly. Bummer. I will call it character, because there is NO WAY I'm sanding again. :)

Jun 5, 2011

Dining Room Table Project - Sanding

I have had quite a few projects going on lately. Refinishing the dining room table is one of them.

I have been reading a lot of DIY blogs (Do It Yourself) and refinishing a dining room table with a stained top and painted legs is a popular project.

Our dining room table was given too us shortly after Dan and I got married because a friend felt sorry for us eating on the coffee table every night. Thanks, John! This table is solid wood and sturdy, perfect candidate for a re-do.

I enlisted the help of my wonderful sister, Betsey to re-finish the table over Memorial Day weekend. I figured it would be easy enough with both of us working on it.
Oh you naive, naive little girl.

Do you have an idea how hard it is to sand varnish/polyurethane/stain off wood???? Wow, I sure do.

It took Betsey and I over 8 hours, spread out over the whole weekend to sand and clean the wood. Yikes! We even took Sunday off because we were so sore from sanding all day on Saturday.

Needless to say, it is still not finished yet. I hope to have all of the primer on by tonight.

Here she is in her original glory.


Lovely cracked finish.


White spots from putting something too hot on the table.


Cracked and worn chairs.


Now she's sanded down! 


Only the top of the table, seats of chairs, and part of the back of the chair were sanded to bare wood. All of the legs and back posts will be painted. They were only sanded enough to make paint stick.


Doesn't it seem easy? Blogs have a way of doing that. They fail to mention the hours of sanding, sore muscles, and multiple trips to Home Depot in search of more, grittier sand paper.

In hindsight, a stripping agent would have been a great thing to use from the start. The sanding process would have been much easier. Also, my co-worker mentioned a Dremmel would be a good tool to get with sanding attachments for the nooks and crannies. We just used our fingers. My skin is still rough from this experience.

You will also notice our sanding job on the chairs isn't stellar. This is because (1) we were TIRED of sanding and (2) thought the color variation would add character. Granted, I didn't think of (2) until 3 days and 8+ hours of sanding later, but that is besides the point. 
It's done!

Jun 4, 2011

Landscaping

Do any of you have ornamental grasses in your landscaping?

Word from the wise: 
1) Split them regularly
2) Weed out new growth shoots regularly
3) Do not plant with landscaping rocks

Here are some untended ornamental grasses:


They don't look so bad, you say? That's because they just started growing for the season. There are actually two grasses back there. The smaller one on the left is about two feet in diameter, and the big mambe-jambe on the right is about 3 feet in diameter. They are big, and they are heavy.

Also note the half-dead looking shrub to the left of the grasses. Do you know why it looks like that? Because it is in fact, half dead. The grasses get so large (6+ feet) that they block all air flow and sun from the plants around them.

Note the hidden flowering bush to the right (picture two above). This sad, beautiful fella is growing up the side of the house desperately gasping for breath (closer shot below).
Also the grasses engulfed the air conditioner. I'm not sure if that affects the performance or not, we rarely use it anyway.

Using the powerful forces of a lever (aka shovel), I worked my way around each grass, prying up a little at a time until I ripped those suckers out.

Now, you might say, why didn't you just split them and plant them again? Or why didn't you donate those lovely greens to some other landscaper in need?
I will tell you why. First, there are so many rocks grown into the roots due to lack of 1) and 2) above that it is impossible to get a shovel through. Second, it took me an hour and a half to dig those suckers out. I believe I'm entitled to the satisfaction of throwing them out.

In case you still don't agree with me, You are free to come dig them out of my yard waste container. They will remain there until garbage day on Monday. Important facts to know: the small one took both Dan and I to lift into the yard waste container, and the big one had to be rolled into the overturned container. These are not light.

On a brighter note!

I was given some beautiful canna bulbs, so I planted those in place of the grasses. I also trimmed (murdered) the half-dead shrub. I'll update when/if those three come back to life!

Oh, I also planted grass seed outside the landscaping area. Do you see how much bare dirt there is?? That's how large those grasses got each year! They would slump over into the yard killing our beautiful grass. Sniff, tear. 

Ta-da! Finished!

Jun 3, 2011

I am woman, hear me roar.

"If you want something done right, you gotta do it yourself."


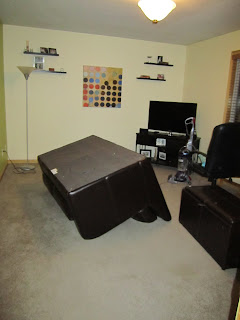
When our realtor mentioned re-staging the office as a family room, her suggestion was to move our loveseat from the living room into the now family room. That way the room looks like it has a purpose and it's cheaper than buying a new couch.

We decided to buy a new couch anyway, but (I) thought moving the loveseat into the family room was a good temporary fix until the new couch arrived.

I was met with resistance. It's too heavy. It won't fit through the doorway. The leather will get scratch. Etc.

Fine. I will do it myself. So I did.


Pardon the blurry pics, I haven't mastered how to take a good picture yet. Here is what I managed to do all by my loansome.

1) Remove area rug from under coach. (The hardest part of this whole process!)
2) Turn loveseat over and remove legs.
3) Drag loveseat through hallway on rug so as not to "scratch the leather."
4) Take through doorway on it's end, not even coming close to getting stuck.
5) Reattach legs and position in room.
6) Put area rug back under couch in living room. (The second hardest part of this process.)

Oh the power of physics/math/whatever you call it:

levers + less friction materials = you can move anything